Identify the moisture before changing the cup
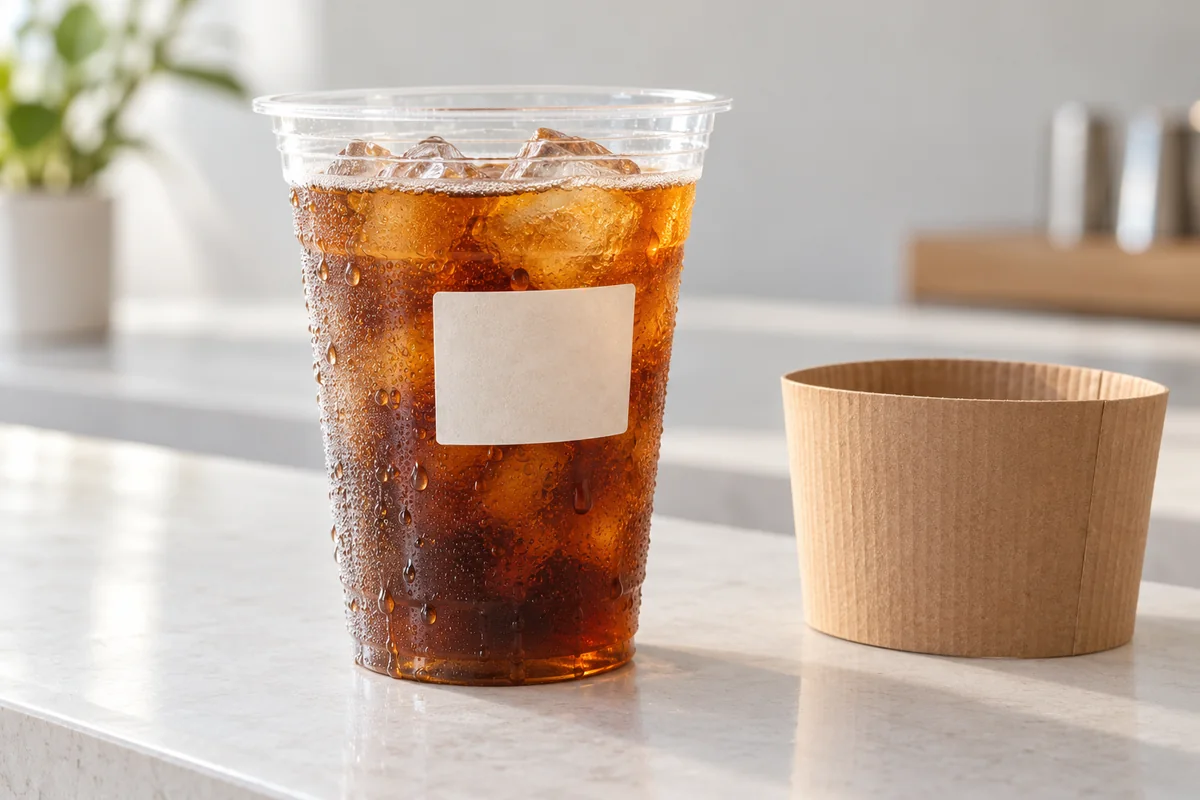
Condensation is water from the surrounding air becoming liquid on a sufficiently cold surface. NOAA's cold-glass demonstration explains that air cooled below its dew point deposits moisture on the glass. For a shop, the practical consequence is that a trial at a dry, air-conditioned counter may not represent a humid outdoor collection area. Record the environment as well as the drink.
Exterior droplets alone do not establish a leak or a PET material defect. A separate leak, splash or drink residue may also wet the cup, so identify what is happening before blaming the label. Removing visible water once does not establish that the surface will stay dry while a cold drink remains inside.
Define the label's job: a brand graphic must remain presentable; an order name must remain readable until collection and handling are complete. An event may require both for a longer period. That required duration comes from the operation, not from the word waterproof.
Separate label material, adhesive and ink failures
A self-adhesive label has a face material—the paper or film carrying the design—and an adhesive attaching it to the cup. The printed image or handwritten mark is another part of the finished construction. A label can stay attached while its text disappears, or keep a sharp image while an edge lifts. Photograph and describe each observation separately.
Film and moisture-resistant paper are candidates to discuss with the label supplier, not automatic approvals. Avery Dennison's wine-label guide distinguishes wet-strength paper from other paper and treats face-material deterioration separately from adhesive performance. That bottle guidance explains why the specification needs more than a material name; it does not qualify any label for a PET cold cup.
| Part to check | Possible observation | What to ask or compare |
|---|---|---|
| Face material | The label softens, tears, changes appearance or loses its surface while remaining attached. | Ask for a face material intended for the planned moisture exposure, including its finished coating or laminate. |
| Adhesive and contact | An otherwise intact label slides, lifts at an edge or detaches. | Check the cup surface, wetness at application, adhesive grade, application conditions and label shape together. |
| Print or handwriting | The label remains sound but colour bleeds, text smears or pigment transfers during handling. | Identify the printer and ink or ribbon, or the marker model and colour; check the surface coating and drying instructions. |
Choose the application sequence before choosing the adhesive
Applying a label to a dry cup and exposing it to condensation later asks the adhesive to maintain an existing bond. Applying it after filling, when droplets are already present, asks it to form that bond through a wet surface. Tell the label supplier which sequence your team can actually use. Do not approve the second process from results obtained with the first.
For the dry sequence, ask for the permitted surface condition and application temperature, the application method, and any required interval before chilling or handling. The service-temperature range describes conditions after application; it is not a substitute for the application-temperature requirement. Nor does a low temperature rating by itself address water already on the cup. Follow the proposed grade's instructions instead of borrowing a waiting time from another label.
Avery Dennison's Z3338 technical overview is a useful bounded example. It discusses an adhesive developed for cold, damp bottles, yet explains that excessive surface water can still cause sliding and failed adhesion. It also calls for an application setup suited to the label and container. This is evidence that wet application needs its own assessment, not a recommendation to use Z3338 on WJPETCUP cups.
If the shop cannot reliably prepare a suitable surface after filling, compare a change in work sequence with a specifically supported wet-application construction. Include the work involved in drying, positioning and replacing failed labels in the buying decision. A lower label price is not useful if the intended process cannot apply it consistently.
Verify the printed image and the handwritten name separately
Ask for samples printed by the method you will buy or use. Avery's US guidance provides a precise example: its Durable White Film has different water-resistance descriptions when printed with pigment-based inkjet or laser equipment versus a standard dye-based inkjet printer. The lesson is to specify the finished label and printing combination. It is not a rule that all inkjet labels fail, or that any laser print will work on any film.
For names written in store, identify the exact marker model and colour and the surface it will touch: bare PET, a label face, or a coating over a label. Follow that marker's instructions and assess the actual interval available before filling and handling. If staff sometimes write after filling, include that sequence separately rather than assuming a result on a dry empty cup applies.
Edding lists waterproof and wear-resistant properties separately for its 500 permanent marker. Those claims illustrate the two questions a buyer should ask: does moisture affect the mark, and does handling remove or transfer it? They do not establish performance on your cup. Compare the colours actually used; black ink is not a universal substitute for checking the exact product.
Keep writing away from the cup interior, drinking rim and lid opening. Waterproof wording does not establish food-contact suitability: edding's own FAQ says its permanent-marker ink should not contact food. Confirm the intended marking location with the supplier. A successful handwritten-name trial also says nothing about factory-printed decoration; if you choose cup printing, use the separate artwork-preparation guide and assess that finished print.
Trade off visibility, curvature and the lid's available space
Check a full-size label on the actual cup at the proposed height. On a tapered cup, a wide rectangular label may wrinkle or lift instead of following the changing shape. Compare a smaller footprint or a shape prepared for that profile, while preserving readable text. The cup's rim diameter does not define the circumference or usable area lower down its body.
Thicker is not automatically better. Avery Dennison's neck-label guide explains how stiffness and a label's tendency to return to its flat shape can increase lifting on curved surfaces. Its Z3338 guide also notes that an added laminate can make a construction too stiff for a bottle curve. These are reasons to assess the finished label, including any protective layer, rather than approving only an unprinted material sample.
A flat area on a lid may offer an alternative location, but inspect the exact lid. Keep the label within a continuous usable area, clear of the closure edge, openings, vents and any feature needed for stacking or opening. Check the closed package as well as the loose lid, and do not assume the lid will remain dry.
A lid label can be visible from above at collection, while a cup-body label can remain with the drink if the lid is removed or replaced. A sleeve may hide either the brand or order information on the body. Decide which information must remain associated with the drink, then check visibility during the real handover. The same placement questions apply to a PET bowl lid, but a flat spot on another supplier's lid does not establish the available label area on yours.
Include grip where it changes the label decision
A customer may want a sleeve to avoid direct contact with a cold, wet cup. Treat a sleeve as a candidate to assess, not proof that condensation stops or that grip improves. Compare the filled cup with and without the proposed sleeve under the same handling conditions. Observe whether the sleeve becomes wet or weak, moves along the cup, makes it harder to hold, or hides the order information.
Check the complete handover: staff lifting the cup, the customer taking it, and placement in any carrier used by the shop. Use normal intended handling; squeezing harder to compensate for a loose sleeve changes the task. A carrier may help with a multi-drink handover, but it does not answer how the individual cup will be held after removal.
Keep the buying questions separate: the label must retain its information, and the cup or sleeve arrangement must remain usable. This guide does not claim that WJPETCUP supplies a particular sleeve or has verified a sleeve-and-cup combination.
A shop example: change the failing part, then check the workflow
Consider a hypothetical café preparing iced drinks for an outdoor event. It needs a brand label and a handwritten order name to remain readable for the organiser's specified period, including collection delays. Staff currently add both after filling. This is an illustrative decision, not a WJPETCUP customer case or a report of completed tests.
The café could compare its current process with applying the proposed label to a dry cup before filling. If a label remains attached but its printed image smears, the next question concerns the print system or protective finish. Buying a more aggressive adhesive does not answer that observation. If the finished label is sound but lifts, review contact, adhesive and geometry instead.
If a name is readable on a dry cup but transfers during wet handling, compare the specified marker on an appropriate writing area and the actual drying interval. If a sleeve is then added, check that the name remains visible and that the sleeve stays in position. Choose the arrangement staff can reproduce during a busy service, including any additional preparation step; leave its performance unresolved until that arrangement has been assessed.
Run a service trial with separate observations
The following is a proposed shop-level comparison, not a standard test method, laboratory certification or WJPETCUP acceptance specification. Agree sample selection, quantity, conditions and acceptance criteria with the relevant suppliers before using the result for an order. Keep untested conditions visibly unresolved.
First, identify the cup and lid, finished label construction and batch, printing method, marker and colour, and any sleeve. Keep an unfilled, dry comparison sample to help distinguish an application problem from a change during service. Compare the current and proposed arrangements using the same drink, fill level, ice preparation and environment. Change one main factor at a time where practical.
Second, record the application sequence and the actual intervals between labelling, writing, filling and handling. Observe the cup surface at application rather than recording only room temperature. If wet application is part of the intended process, assess it as a separate condition supported by the label supplier; do not pool its result with dry application.
Third, follow the planned service from preparation through collection and the required customer-use period. Record ambient temperature and humidity where measurable, drink temperature and any move between environments. Use the duration required by the buyer, including realistic delays. For an event requiring more than an hour, checking a newly filled cup at the counter does not cover that requirement. No universal survival time is established here.
Finally, inspect the face material, adhesive, information and grip separately at the agreed stages. Include actual handling and a defined wipe or rub comparison if transfer matters; record the material, wetness and repeated motion used. That comparison is a local screening method, not a standard abrasion test. Keep photographs and observations tied to the same sample and elapsed time.
| Record item | What to enter | Decision it supports |
|---|---|---|
| Construction and process | Cup, label and marker references; print method; placement; dry or wet application; actual preparation intervals. | Identifies the combination that was assessed. |
| Exposure | Drink and fill conditions; environment; temperature and humidity observations; elapsed time; handling steps. | Shows whether the trial represents the intended service. |
| Label face and attachment | Changes to appearance or strength; edge lifting; sliding; detachment; where and when each occurred. | Separates material deterioration from attachment concerns. |
| Information and transfer | Whether required text remains readable; any smear or transfer after the recorded handling or wipe. | Checks function beyond the label merely staying attached. |
| Grip and operation | Sleeve movement or wetting; visibility; ease of handover; extra preparation and rework observed. | Checks whether the arrangement is practical for staff and customers. |
Buy the combination your operation can reproduce
Ask the cup supplier for the exact model and available information about the proposed label area. Give the label supplier the cup sample or drawing, required label size, surface condition at application, service environment, duration and print method. Ask the marker supplier about the actual writing surface and handling requirement. Keep these requests connected so that each supplier is assessing the same use.
Select a finished construction and work sequence against the agreed observations, then include label cost, application work and observed rework in the comparison. Revisit the decision when the cup profile, label adhesive, surface coating, printing method, marker or service conditions change. A different cup carrying the same drink-size name is not automatically covered.
For WJPETCUP cup printing, the production-schedule guide covers the confirmed order and sampling conditions. Those conditions do not establish label supply, sleeve availability or a condensation-test service. Send the cup requirement and intended use so that the available cup information and sample options can be clarified.
Read more
Start with the cup and the serving conditions
Send the PET cup model, a photo or sketch of the proposed label area, the drink and handling conditions, and your planned order quantity. Ask which cup details and samples are available for your label supplier to assess.